Access the Remote Command Line with SSH

After completing the work in this module you will be able to:
In this section, we'll cover two main learning objectives: First, you'll learn how to log into remote systems and execute commands securely. Second, we'll explore how to configure user accounts for key-based authentication, which eliminates the need for password-based logins and significantly improves security.
Secure SHell (SSH) creates a secure connection over an insecure network using public key encryption. In this section you will learn how to log into a remote system and run commands.
[student@workstation ~]$ ssh student@servera
student@servera's password:
...output omitted...
[student@servera ~]$
Let's start with the most basic SSH connection. The standard syntax is ssh username@hostname. In our lab environment, if the student user wants to connect to a server called "servera", they would type ssh student@servera.
[student@workstation ~]$ ssh servera
student@servera's password:
...output omitted...
[student@servera ~]$
There's a convenient shortcut here. Since the student has the same username on both the local system and the remote server "servera", the command can be simplified to just ssh servera. SSH will automatically use the current username when no username is specified. This is a common scenario in enterprise environments where users often have consistent usernames across multiple systems, making remote access more streamlined.
[student@servera ~]$ exit
Connection to servera closed.
[student@workstation ~]$
Once you're connected to a remote system via SSH, you'll eventually need to close that connection and return to your local system. The exit command is your way out. When you type exit and press Enter, it cleanly closes the SSH connection and returns you to the command prompt of the host where you initiated the connection. It's important to use exit rather than just closing your terminal window, as this ensures the remote session is properly terminated and doesn't leave hanging processes on the remote server.
[student@workstation ~]$ ssh developer1@servera
developer1@servera's password:
...output omitted...
[developer1@servera ~]$
Here we see a practical example of logging into a remote system as a different user. The student user on the workstation is connecting to servera as the developer1 user using the command ssh developer1@servera. Notice that SSH prompts for developer1's password on servera. This is password-based authentication in action. The system is asking for the password of the target user account (developer1) on the remote system (servera), not the password of the local user (student). After entering the correct password, you can see the command prompt changes to developer1@servera.
[student@workstation ~]$ ssh servera uptime
20:06:13 up 2 min, 0 users, load average: 0.18, 0.06, 0.02
[student@workstation ~]$
One of the powerful features of SSH is the ability to execute commands on a remote system without actually logging into an interactive shell. You can accomplish this by including the command after the hostname in your SSH command.
[student@workstation ~]$ ssh student@servera w
16:13:38 up 36 min, 1 user, load average: 0.00, 0.00, 0.00
USER TTY FROM LOGIN@ IDLE JCPU PCPU WHAT
developer2 pts/0 172.25.250.10 16:13 -bash
developer1 pts/1 172.25.250.10 16:24 -ls
[developer1@workstation ~]$
For example, if you want to run the w command on servera to see who's logged in, you would type: ssh servera w. The system will connect to servera, execute the w command, display the results, and then immediately close the connection.
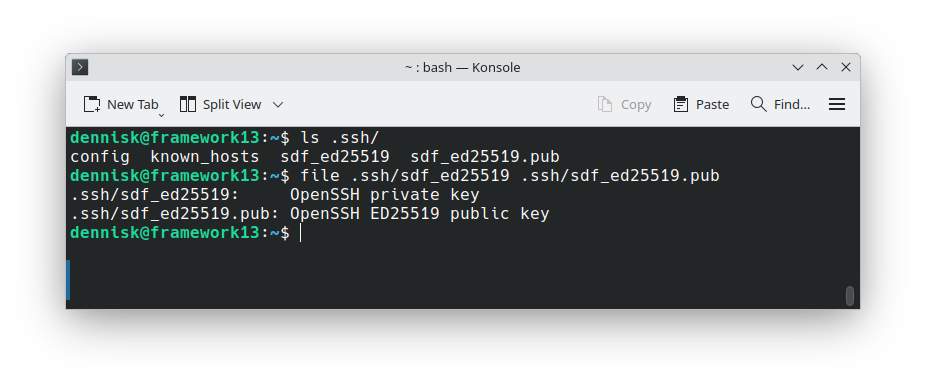
To establish a SSH connection remote server sends a copy of its public key to the client before logging in. Public keys end in a .pub extension. The private key must not be shared.
[student@workstation ~]$ ls .ssh/
config  known_hosts lab_rsa lab_rsa.pub
[student@workstation ~]$
When you connect to a server for the first time, SSH will ask you to verify the server's fingerprint and then store the server's public key in a file called known_hosts located in the ~/.ssh/ directory in your home directory. Since our student user has previously logged into servera, a copy of servera's public key is already stored in this known_hosts file. This prevents man-in-the-middle attacks - if someone tries to impersonate servera, their public key won't match the one stored in known_hosts, and SSH will warn you about the potential security threat. This mechanism provides ongoing protection against server impersonation attacks, which is crucial in enterprise environments.
If the StrictHostKeyChecking parameter is set to yes, then the ssh command always aborts the SSH connection if the public and private keys do not match. Otherwise ssh will ask for a password.

Log into a remote system as different users and execute commands.

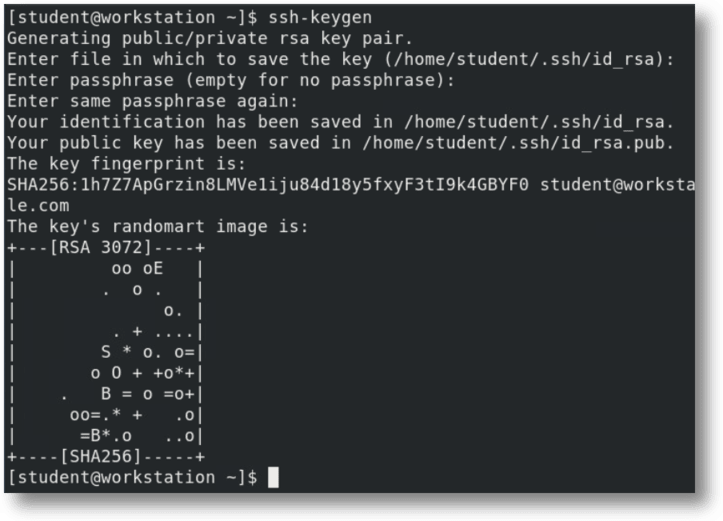
Using SSH keys for authentication is significantly more secure than password-based authentication. The process starts with the ssh-keygen command, which generates a mathematically related key pair consisting of a secret private key and a shareable public key with a .pub extension. When you run ssh-keygen, the command will suggest a default filename for your keys, typically id_rsa for the private key and id_rsa.pub for the public key. However, you can specify a custom name if you prefer, which is useful when managing multiple key pairs for different purposes. The command will also offer the option to secure your private key with a passphrase. This adds an extra layer of security - even if someone gains access to your private key file, they'd still need the passphrase to use it.
Using SSH keys for authentication is significantly more secure than password-based authentication. The process starts with the ssh-keygen command, which generates a mathematically related key pair consisting of a secret private key and a shareable public key with a .pub extension. When you run ssh-keygen, the command will suggest a default filename for your keys, typically id_rsa for the private key and id_rsa.pub for the public key. However, you can specify a custom name if you prefer, which is useful when managing multiple key pairs for different purposes. The command will also offer the option to secure your private key with a passphrase. This adds an extra layer of security - even if someone gains access to your private key file, they'd still need the passphrase to use it.
The newly generated key pair is automatically placed in the hidden .ssh directory within the user's home directory. This directory is created automatically if it doesn't exist, and it has specific permissions that ensure only the user can access it. The .ssh directory typically contains several important files: your private keys, public keys, the known_hosts file we discussed earlier, and potentially a config file for SSH client configuration. The security of this directory is critical to the overall security of your SSH setup.
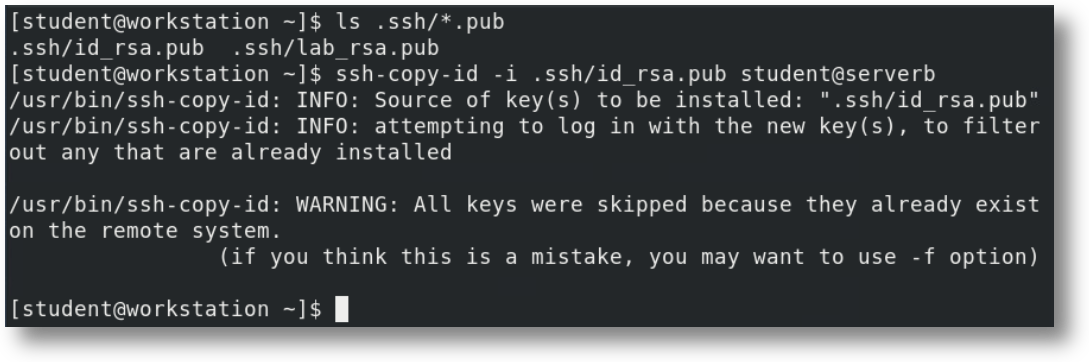
Once your key pair is generated, you need to upload the public key to any remote hosts you want to access. The ssh-copy-id command makes this process simple and secure.
For example, ssh-copy-id servera will copy your public key to the servera host and add it to the authorized_keys file for your user account. You'll need to enter your password this one time to complete the setup. One of the great advantages of this system is that a single public key can be uploaded to multiple hosts, allowing you to access multiple servers with the same key pair. Alternatively, you can generate different key pairs with different names for different hosts or different purposes, providing fine-grained access control.
[student@workstation ~]$ eval $(ssh-agent)
Agent pid 10155
The ssh-agent is a helper program that runs in the background and manages your SSH keys. When you start ssh-agent, it can hold your decrypted private keys in memory, eliminating the need to enter your passphrase every time you make an SSH connection. Starting ssh-agent in the background allows it to persist for your entire login session, making frequent SSH connections much more convenient while maintaining security.
[student@workstation ~]$ ssh-add
Identity added: /home/student/.ssh/id_rsa
The ssh-add command loads your private keys into the ssh-agent. Once loaded, the agent will cache these keys for approximately 5 minutes of inactivity by default. This means you can make multiple SSH connections during this period without re-entering your passphrase. This caching behavior strikes a balance between convenience and security - keys aren't cached indefinitely, but they're available long enough to support typical workflow patterns where you might need to connect to multiple servers in sequence.
[user@host ~]$ ssh -v user@remotehost
OpenSSH_8.7p1, OpenSSL 3.0.1 14 Dec 2021 1
debug1: Reading config. data ssh_config 2
debug1: Reading config. data ssh_config.d/01-train.conf
When troubleshooting SSH connections or when you want to understand exactly what's happening during the connection process, you can use the -v option for verbose output. This shows detailed information about each step of the connection process. The verbose output includes information about key exchange, authentication methods being tried, and any errors that might occur. This is invaluable for diagnosing connection problems or understanding how SSH negotiates the secure connection.
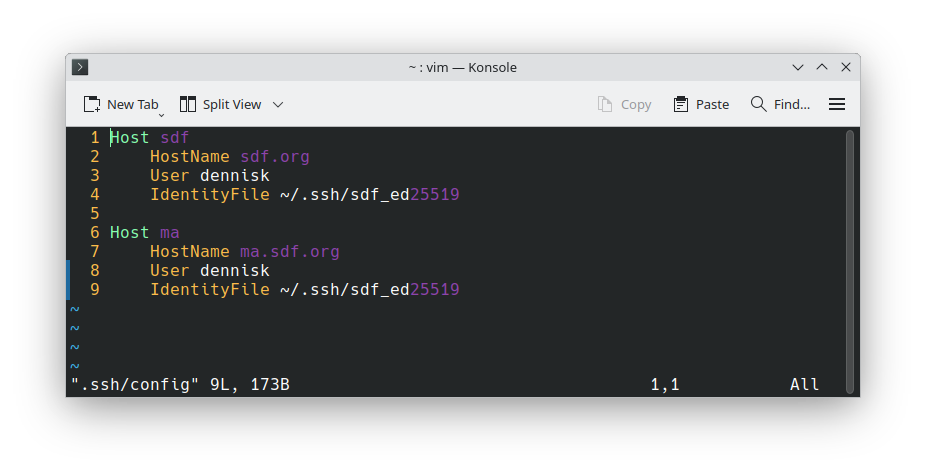
An SSH configuration file can greatly simplify the connection process, especially when you regularly connect to multiple hosts with different parameters. The config file is located at ~/.ssh/config and contains connection information for various hosts. In this example, we see two host entries: "sdf" and "ec2". Each entry can specify the actual hostname, username, port number, key file to use, and many other connection parameters. This eliminates the need to remember and type complex connection details every time.
[dennisk@sahuaro ~]$ ssh sdf
With the SSH config file properly configured, login becomes much simpler. Instead of typing ssh username@full-hostname-or-ip -i /path/to/keyfile -p port, you can simply type ssh sdf or ssh ec2, and SSH will automatically use all the parameters defined in the config file. This dramatically improves efficiency for system administrators who need to connect to multiple servers regularly, and it reduces the chance of connection errors due to typos in complex hostnames or parameters.
Now we'll move into a hands-on exercise where you'll configure key-based authentication for SSH. This is a practical application of everything we've discussed so far. When the exercise asks you to enter a passphrase, just press the Enter key twice to skip setting a passphrase. While passphrases add security in production environments, we're omitting them in this lab for simplicity unless specifically requested. Remember, this exercise will involve generating keys, copying them to remote hosts, and testing the passwordless authentication.
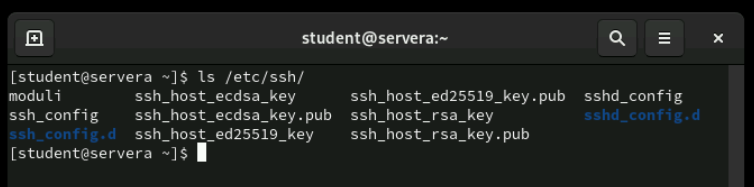
/etc/ssh/sshd_config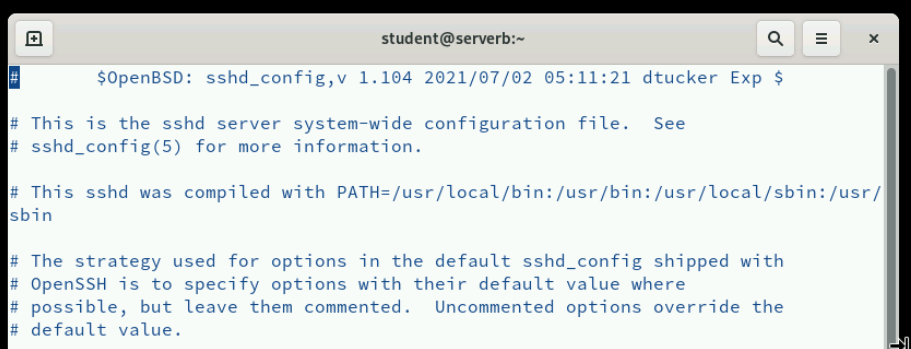
Now let's shift our focus to the server side of SSH security. The SSH server (sshd) behavior is controlled by the /etc/ssh/sshd_config file. This file contains numerous configuration options that can be customized by uncommenting lines and changing their default values. This configuration file controls how the SSH server accepts connections, what authentication methods are allowed, which users can connect, and many other security-related parameters. Understanding this file is crucial for properly securing your SSH server.
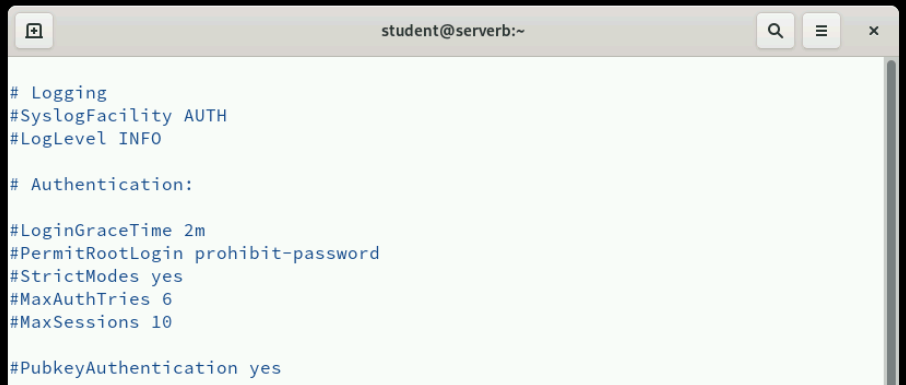
One of the most important security configurations is disabling direct root login via SSH. In the /etc/ssh/sshd_config file, you can find the PermitRootLogin directive. By default, this might be set to prohibit-password, but for maximum security, you should change this to no. Disabling root login forces attackers to first gain access as a regular user and then escalate privileges, adding an extra layer of security. It also provides better audit trails since you can track which user performed administrative actions.
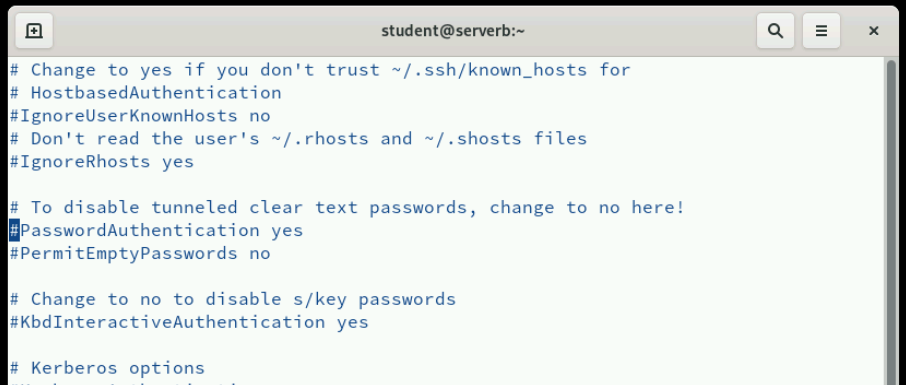
Another crucial security measure is disabling password-based authentication entirely. In the /etc/ssh/sshd_config file, locate the PasswordAuthentication directive and change it from yes to no. This forces all users to use key-based authentication, eliminating the risk of password-based attacks like brute force attempts or dictionary attacks. However, make sure you have working key-based authentication set up before implementing this change, or you could lock yourself out of the system.
[student@servera ~]$ sudo systemctl restart sshd.service
After making changes to the /etc/ssh/sshd_config file, you must restart or reload the SSH service for the changes to take effect. You can use either systemctl restart sshd to fully restart the service, or systemctl reload sshd to reload the configuration without dropping existing connections. The reload option is generally preferred in production environments because it doesn't interrupt existing SSH sessions. However, restart ensures that all configuration changes are fully applied.
In this exercise, you'll practice the server-side security configuration we just discussed. You'll be disabling direct root login and disabling password-based authentication for the OpenSSH service. Remember to have your key-based authentication working before disabling password authentication, and always test your changes carefully to ensure you don't lock yourself out of the system.
/etc/ssh/known_hosts and .ssh/known_hosts.These resources will help you understand the concepts covered today.

This comprehensive lab brings together everything we've learned in this lesson. You'll set up key-based authentication for users, disable direct root login, and disable password authentication for all users. This lab simulates real-world SSH hardening procedures that you would implement in a production environment. Take your time and follow the steps carefully, as these are critical security configurations.
Thank you for your attention during this presentation on configuring and securing SSH in Red Hat Enterprise Linux. We've covered the fundamental concepts of SSH security, from basic connections to advanced server hardening. The skills you've learned today - setting up key-based authentication, configuring SSH clients and servers, and implementing security best practices - are essential for any Linux system administrator. SSH security is not optional in today's threat environment; it's a critical foundation for secure remote system administration. Remember to practice these concepts in your lab environment and consider how they apply to your specific use cases and organizational security requirements.
Created on 17 February 2025 by Dennis Kibbe. Last modified on 21 September 2025 by DNK.
Keyboard Shortcuts
Welcome to today's lesson on configuring and securing SSH connections in Red Hat Enterprise Linux. SSH, which stands for Secure Shell, is a cryptographic network protocol that creates secure connections over insecure networks like the internet. The key here is that SSH uses public key encryption to establish this secure tunnel. SSH is absolutely critical in enterprise environments where administrators need to manage multiple servers remotely. Without SSH, we'd be relying on insecure protocols like Telnet, which transmit data including passwords in plain text. This slide presentation was created by B6Plus. The audio accompanying this presentation is AI-generated.