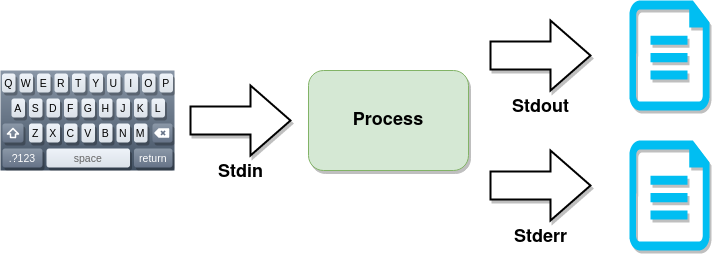
Standard Input, Standard Output, and Standard Error
[student@servera ~]$ ls -R /etc/
After completing the work in this module you will be able to:
Shell redirection lets you redirect the output of the keyboard to a file instead of displaying it on the monitor. A pipe takes the output of a command and uses it as the input to another command.
[student@servera ~]$ ls -R /etc/
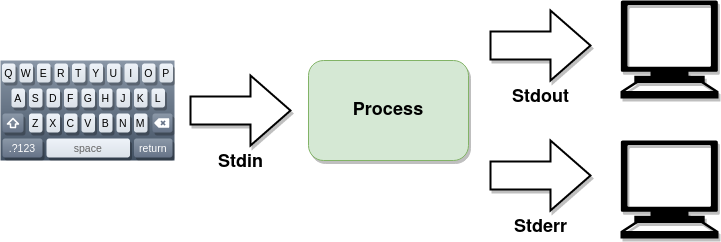
Standard Input is how you communicate with a program usually with the keyboard or it could be with the mouse or another means. Standard Output, and Standard Error are the responses you get from the program. Normally, you want what you type on the keyboard to show on your monitor but sometimes you want to redirect some or all of the output to a file instead.
[student@servera ~]$ ls -R /etc/ > file1
In this example standard output is redirected to a file overwriting the content if the file already exists while standard error still goes to the monitor.
[student@servera ~]$ ls -R /etc/ >> file1
Use a double > if you want to keep the content in the file and append the new content to the end of the file.
[student@servera ~]$ ls -R /etc/ 2> file2
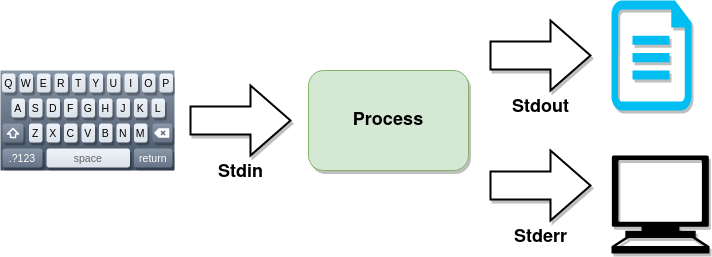
In this example Stderr is redirected to a file.
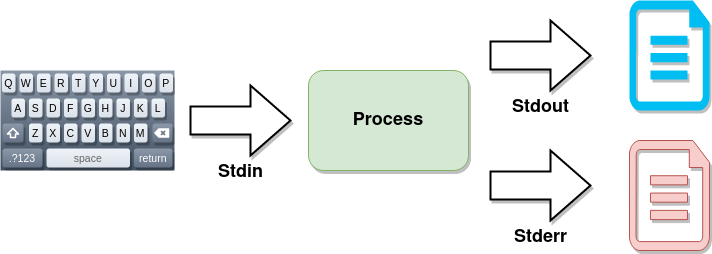
[student@servera ~]$ ls -R /etc/ > file1 2> /dev/null
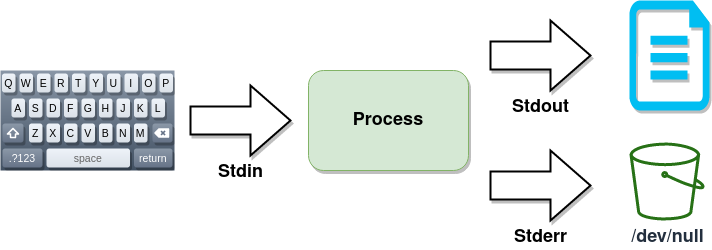
If you are not interested in seeing any error messages you can redirect standard error to /dev/null which is known as the "Bit Bucket" a black hole for data. This is useful in Bash shell scripts.
[student@servera ~]$ ls -R /etc/ > file1 2>&1
Both standard output and standard error can be redirected to the same file.
[student@servera ~]$ ls -R /etc/ > file1 2> file2
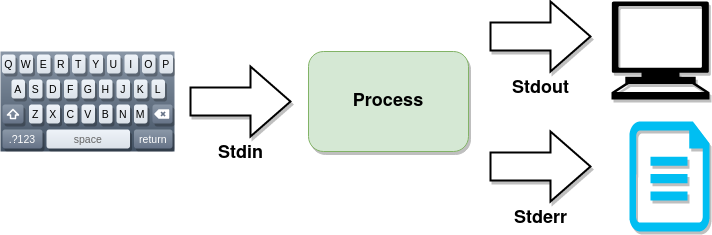
In this example standard output is redirected to file1 while standard error is redirected to file2.
[student@servera ~]$ cat /etc/passwd | wc -l
A pipeline is a sequence of one or more commands that are separated by the vertical bar character (|). A pipeline connects the standard output of the first command to the standard input of the next command. This example will display the number of accounts on the system.

After reading this section in the textbook complete the quiz in Canvas.

Unlike Windows system administration in Linux is often done by editing plain text files using a text editor like Vim. While graphical editors exist they are often impractical when you need to configure a remote server over a slow connection.
Vim has become the standard command line editor in UNIX and Linux because it is available on all distributions, works over slow connections, and allows you to make quick, precise edits. While Vim is not intuitive nor is it menu-driven, every system administrator needs to have a basic understanding of how Vim works.
[student@servera ~]$ vim myscript.sh
To get started with Vim simply type vim plus the name of the file you wish to edit. Vim will recognize type of file (in this case, a Bash shell script) and provice the correct syntax coloring which helps to catch errors as you type.
Unlike other text editors, in Vim you do not start off immedently editing a file. When you open Vim you are placed in the Normal mode. In the Normal mode keystrokes move you around the screen. To actually edit a file you need to enter the Insert mode by pressing i on the keyboard. To save changes to a file requires that you first press the Escape key to return to the normal mode and press the colon (:) character to enter the Command mode. In the Visual mode you can edit text in columns and rows.
These basic key strokes will let do most editing in Vim. To become more efficient in Vim see some of the resources at the end of this presentation.
.vimrc Configuration File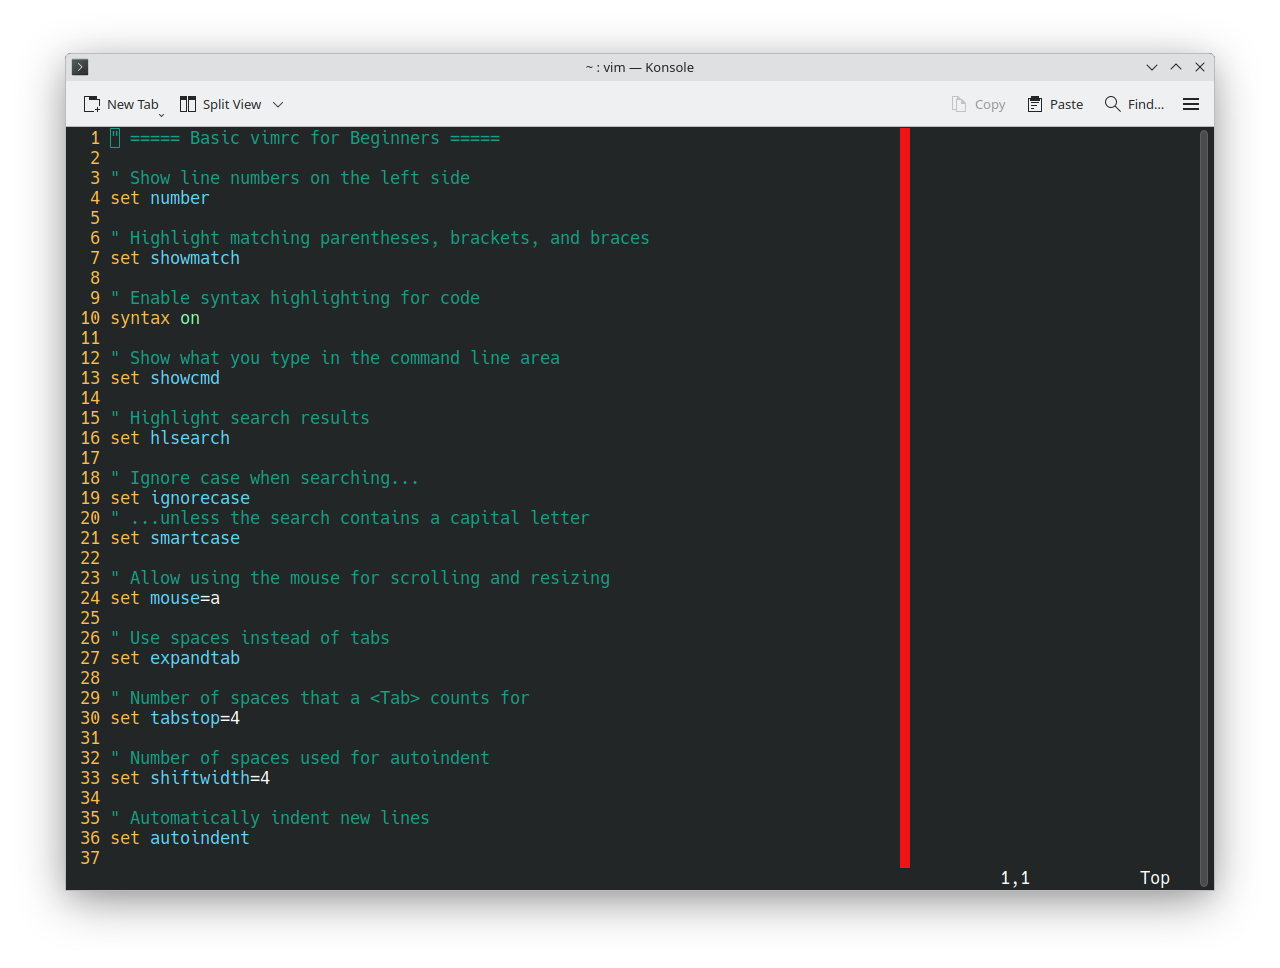
You can customize how Vim runs in a hidden .vimrc file. In this example the proper indentation for YAML files and line numbers are set.
Vim saves edits as you type in case Vim dies while editing a file. This could be caused, for example, by a broken network connection. Vim creates a hidden swap file and offers to recover your work when you restart Vim. This short video shows how it works.
vimtutor Command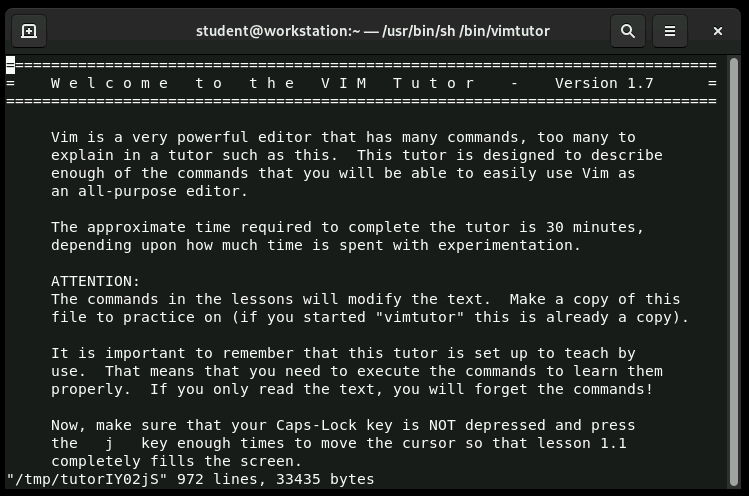
The vimtutor program which is installed along side Vim is a good place to start learning the basics of Vim. When the vimtutor program is run it starts an instance of Vim with a practise tutorial file which makes it easy to get up to speed on the basics of using the Vim text editor.

Use the vimtutor command to practice basic editing techniques in the vim editor.
[student@servera ~]$ printenv $PATH
/home/user/bin:/usr/local/bin:/usr/bin:/bin
[student@servera ~]$ printenv $HOME
/home/user
A Linux system uses many preset variables which set the environment every time a shell is opened. Examples are the PATH variable which is a list of directories where commands can be found and the HOME variable which defines the user's home directory.
[student@servera ~]$ VARIABLENAME=value
The syntax for setting a variable is the variable name followed by an equal sign followed by the value assigned to the variable. Like most things in Linux variables are case sesnitive. Shell variables are unique to the current shell and disappear when the session is terminated.
[student@servera ~]$ set | less
BASH=/bin/bash
BASH_VERSION='4.4.23(1)-release'
HISTFILE=/home/user/.bash_history
HISTFILESIZE=1000
OSTYPE=linux
PAGER=less
PATH=/home/user/bin:/usr/local/bin:/usr/bin:/bin
output omitted...
The set command lists all the varibles set for the current shell both environmental variables and shell variables.
[student@servera ~]$ pet=hamster
[student@servera ~]$ echo "My favorite pet is my $pet."
My favorite pet is my hamster.
You create a variable by assigning a value to a name with the equal sign. To use the variable the dollar sign tells the shell that the second instance of pet should be replaced with the value hamster.
[student@servera ~]$  PS1="[\u@\h \W]\> "
[student@servera ~]>
The PS1 prompt is a shell variable and can be changed to display a custom prompt when a Bash shell is opened. Here the > is used to replace the dollar sign at the end of the prompt for a non-priviledged user. See Resources below for further customization options.
[student@servera ~]$ export EDITOR=nano
The visudo command consults the environmental variable EDITOR to determine which editor to use. If you want to use a different editor, nano for example you can use the export command to set nano as the default editor temporarily.
[student@servera ~]$ echo "export EDITOR=nano" >> ~/.bash_profile
To make the editor change permanent append the command to ~/.bash_profile. The Bash shell reads ~/.bash_profile each time it starts.
[student@servera ~]$ type ls
ls is aliased to 'ls --color=auto'
Creating a Bash alias lets you run a long command with a minimal amount of typing. In this example the type command shows that ls is actually an alias for ls --color=auto. There is a short exercise in Canvas where you will create a simple alias.
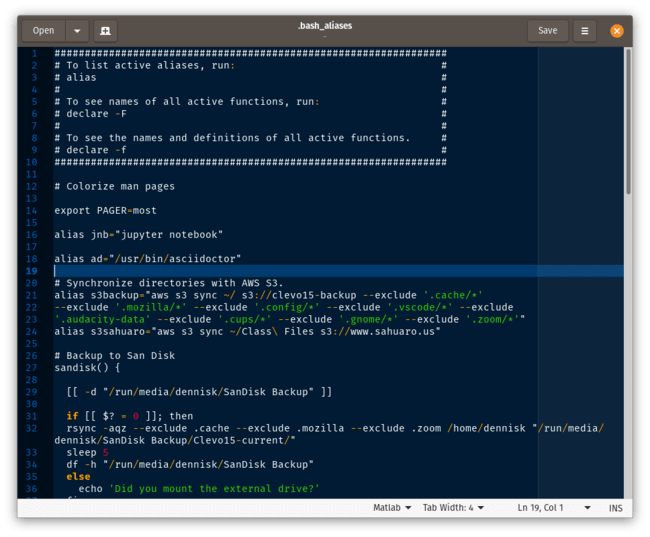
When the Bash shell is closed the newly alias is no longer availabe. To make the alias permanent add it to the ~/.bashrc file. When the shell starts it will use any aliases found in that file. This excerpt from the ~/.bashrc file on my laptop shows several alaises and a Bash function used to back up the labtop to an AWS S3 bucket.
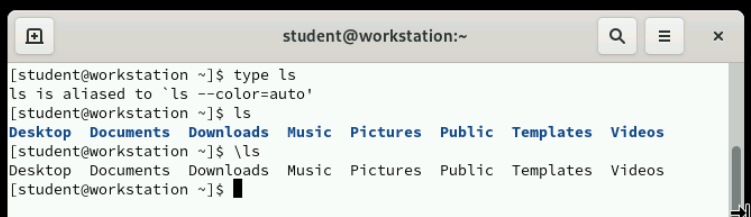
To temporarily unalias a command run it with the backslash (\) character.
In this exercise you use shell variables and variable expansion to run commands, and set an environment variable to adjust the default editor for new shells.

In this lab you edit a text file with the Vim editor. When you complete the lab submit a screenshot of the output of the lab grade edit-review command.
Keyboard Shortcuts